Polycom Zero Touch Provision (ZTP) and PDMS-SP

Written by Mira Beltre
Updated at February 20th, 2026
Table of Contents
Scope
Intended Audience: All Users
This article goes over the steps of how to add a device via Polycom's ZPT as well as PDMS-SP
Requirements
ZTP
- Access to Polycom ZTP site
- A list of all MAC Addresses needed to be added to ZTP
- MAC addresses must already have been entered in the Manager Portal
PDMS-SP
- An Obitalk.com Account
- Lineman's butt set, or an analog phone
- All entries are case-sensitive unless otherwise noted
- Firmware Version Required: 3.1.0 (build 5110)+
Polycom Zero Touch Provision (ZTP)
Note: All Polycom Devices are compatible with Polycom Zero Touch Provision (ZTP)
Provisioning: Add Global Username and Password to Polycom ZTP Profile
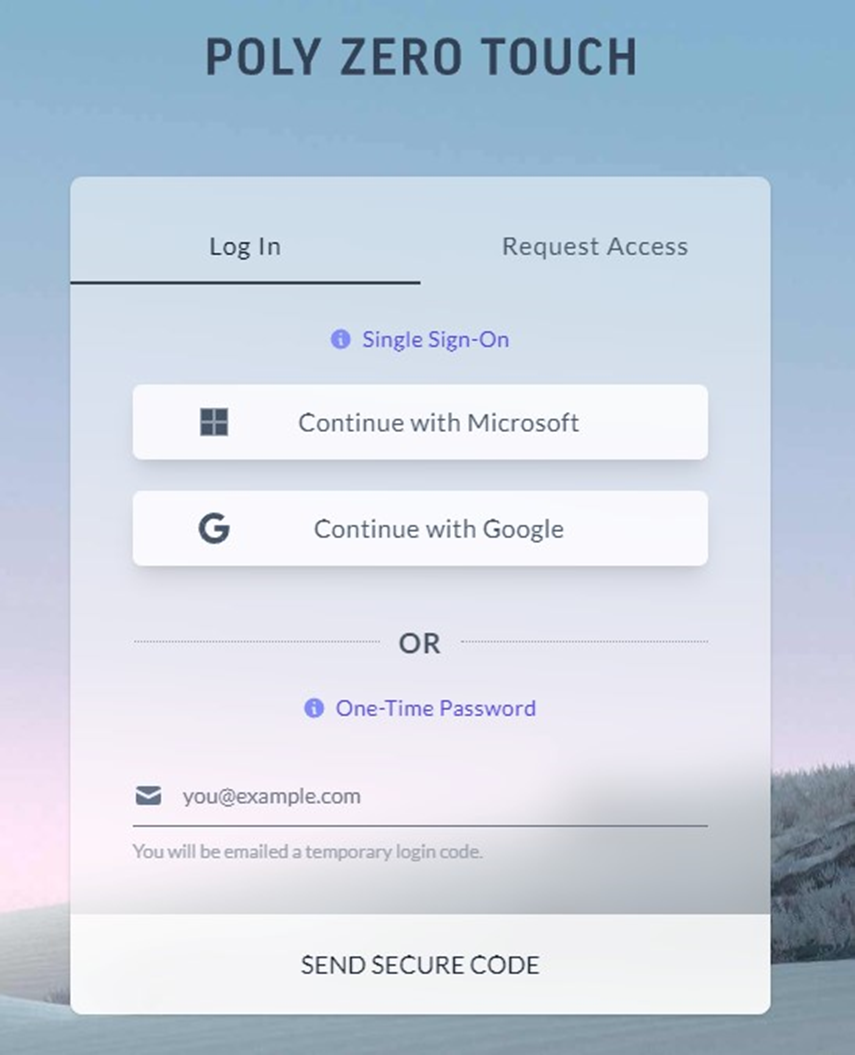
- Log into your Poly ZTP console

- Select the Profile option from the top menu

- Select the profile you wish to add the Global username and password to
- Under Provisioning, enter the provisioning URL http://ndp.ucaasnetwork.com/cfg and the
Global Username and Password, then click Save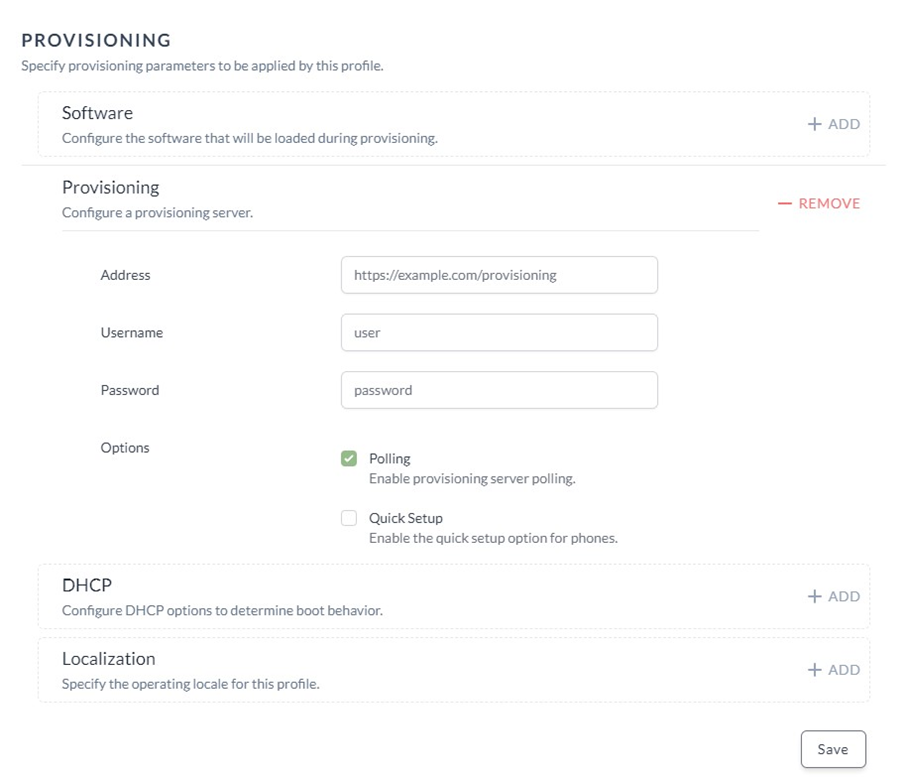
- All future devices using the selected profile will now use the Global One Time Username and Password to authenticate with the configuration server.
Adding Devices to ZTP
- Log into your Poly ZTP console
- Select the Device option from the top menu

- Select Register Devices

- Fill out the following information
- MAC Address: MAC Address of Phone
- Profile: Select the profile name of the provisioning server
-
Tag: <domain name> optional
Note: Alternatively, you can also download the template, fill out the fields, and upload the devices via .csv
- Click Register Devices

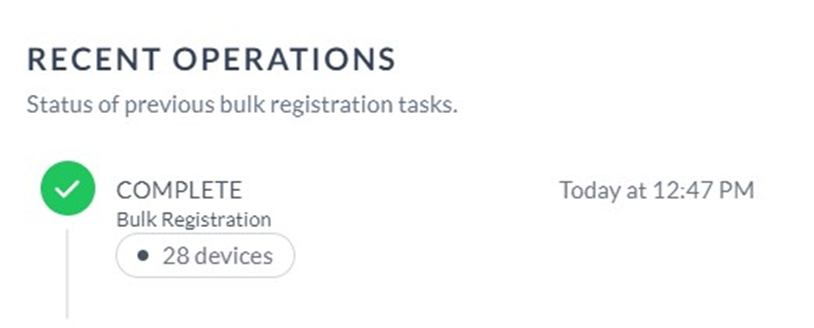
- The status of the registration will be confirmed once it is completed