Create Mobile-X Subscribers

Written by Marissa Orsini
Updated at November 4th, 2025
Table of Contents
Scope
Intended Audience: White Label Partners or Client Success Team
This article outlines how to create a subscriber in Mobile-X. Each subscriber corresponds to an extension in the PBX.
Requirements
- Access to Mobile-X Control Panel
- User's PBX SIP Credentials
- Existing Mobile-X Group
- Phone Number for Subscriber
Create Subscriber
- Log in to Mobile-X Control Panel
- Navigate to the group you wish to add products to
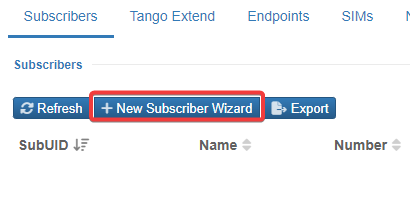
- From the Subscribers tab, click + New Subscriber Wizard
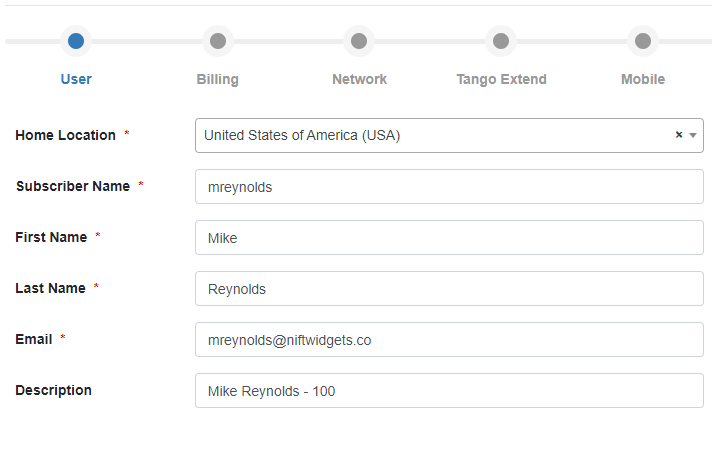
- Complete the following fields:
- Home Location: United States of America (USA)
- Subscriber Name: User's first initial and last name
- First Name: User's first name
- Last Name: User's last name
- Email: User's email address
- Description: <User's Name> - <User's Extension>
- Click Next
- Set Bundle to Primary SIM USA Enterprise subscriber bundle base and click Next

- Configure the following settings and click Next:
- SIM Type: Physical SIM or eSIM
- SIM: Select an available SIM
-
Number: Select an available number

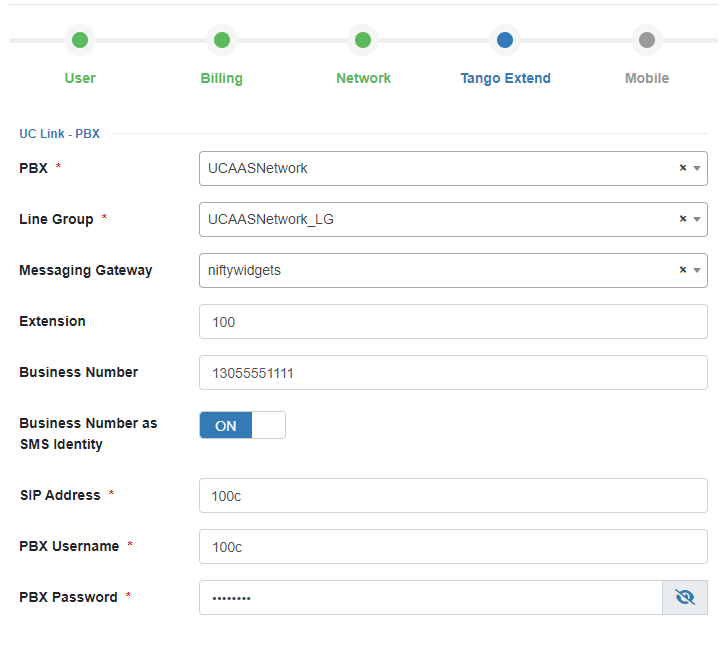
- Complete the following fields and click Next:
- PBX: UCAASNetwork
-
Line Group: Select the corresponding core for the user here.
- UCAASNetwork_LG_IAD = IAD Core
- UCAASNetwork_LG_ATL = ATL Core
- UCAASNetwork_LG_PHX = PHX Core
- Messaging Gateway: Select the domain name of the client
- Extension: User's Extension
- Business Number: Number you selected in step 7c
- Business Number as SMS Identity: Yes (only if SMS is enabled for the user, otherwise select No)
- SIP Address: SIP Username on SIP Device Credentials
- PBX Username: SIP Username on SIP Device Credentials
- PBX Password: SIP Password on SIP Device Credentials
-
Roaming Profile: PLCY_RMG_NAM_RLAH
- Set the following controls and click Save:
- Voice: On
- Data: On
-
Messaging: On
 .
.
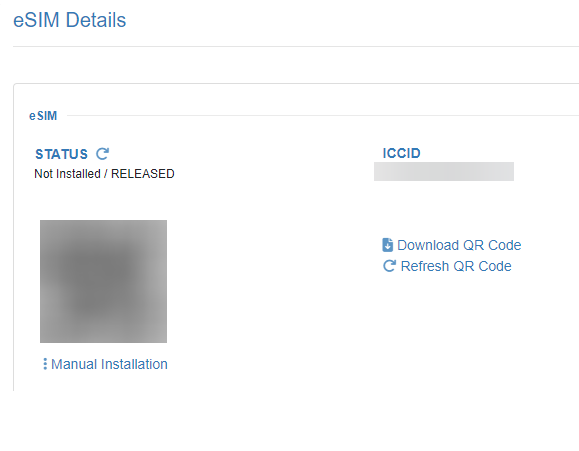
- If the subscriber is using an eSIM, select SIM > eSIM details

- Select Download QR or screenshot the QR Code. This code will be provided to the subscriber for setup of their eSIM.